
As they say in sports, games are won in the offseason. The same can be said about your lawn. Putting in the effort and the work in the spring gives you a winning lawn in the summer. Check out this spring to-do list to prepare your Austin lawn for summer domination.
Spring lawn care tips for your Austin lawn:
- Do a soil test
- Apply pre- or post-emergent herbicides
- Test your sprinkler system
- Water wisely (or not at all)
- Check the lawn for disease or insect problems
- Ready, set, mow!
- Dethatch, and aerate, and topdress, oh, my!
- Fertilize the grass…maybe
- Mulch
1. Do a soil test

Experts recommend testing your soil at least once every three to five years, but every year is ideal.
Wait until early March or so, when the coldest days are behind you, to collect a sample. Here’s how:
- Call your local Extension Office to obtain soil sample bags (or ask if you can provide your own). If you provide your own, you’ll need the bag to hold one pint of soil.
- Collect your tools:
- Trowel, spade, or soil sampler probe
- Bucket
- Collect five to 10 samples from the lawn at a depth of 4 inches. Discard the top one-half inch of soil before placing it in the bucket. (Note: If you’re sampling a field or pasture, the depth requirements are different.)
- Put each sample in the bucket. Mix the samples together.
- Make sure you select the proper test on the form. Ask the Extension Office if you have questions. The test for routine nutrients is the most common. Other tests for micronutrients, boron, salinity, lime, and organic matter are also available.
- Some experts recommend drying your sample on brown paper bags before mailing it in.
- Mail in your soil sample.
- Wait 2-3 weeks for the results.
2. Apply pre- or post-emergent herbicides
Pre-emergent herbicides
A pre-emergent herbicide is just what it sounds like: It is a herbicide that is applied before weeds sprout to kill the weeds as they reach the soil level.
Pre-emergent herbicide timing will vary from year to year. Pre-emergent herbicides are generally applied sometime between January and March when the soil temperature reaches 50-55 degrees for a few consecutive days.
Consider using the soil temperature tool from Syngenta to know when the soil hits that critical 50-55 degree mark. All you need to do is type in your city and select a date range to see the soil temperatures in your area.
If you prefer not to use chemicals on your lawn, consider other options to prevent weeds, such as creating a full, thick lawn to crowd out weeds, or using corn gluten meal as a homemade weed killer.
If you want to talk with an expert before you apply anything to your yard, contact a lawn care pro in Austin.
Post-emergent herbicides
If you’re already seeing weeds in the lawn, you’ll need to consider other treatment options:
- ID the Weed
Use TAMU’s “Turfgrass Weeds” photo gallery to identify the broadleaf or grassy weeds in your lawn, or look at these photos of common Texas weeds.
- Know Your Grass
Certain grass types, St. Augustine in particular, can be damaged by common herbicides. Know which grass you have and read the label to make sure the product is suited for your grass type. St. Augustine, for example, is one of the best grass types for Austin lawns.
- Select a Post-Emergent Herbicide
Read the label on common herbicides to make sure they are 1) suited for the weed you are trying to kill and 2) suited for your grass type.
If you prefer a more natural approach, consider using an Integrated Weed Management approach, such as hand-pulling weeds; using natural and organic weed killers; or focusing on cultural controls, such as creating a thick, tall stand of grass to crowd out weed competition and deprive weeds of sunlight.
Choose organic weed killers certified by the Organic Materials Review Institute (OMRI). Look for the words “OMRI Listed” on products at your local home improvement store.
Pro Tip: The earlier you treat weeds, the better chance of keeping them from sprouting in your yard. And remember, the best offense against weeds is a full, healthy lawn.
3. Test your sprinkler system

Spring is the time to have your landscaping or sprinkler company do a spring activation. (Note: Schedule this appointment well in advance. Their schedules fill up quickly once the weather starts to warm up.)
After that, you’ll want to do a home irrigation audit or catch can test. (This test is sometimes called a tuna can audit since you can use tuna cans if you don’t have professional gauges.) This will help you to make any needed adjustments to your irrigation system. An irrigation audit ensures your lawn will be properly watered (no dry spots, water on the hard surfaces, or overwatered areas).
Place the cans in the yard.
- Use five to nine cans per zone.
Turn on the sprinklers.
- Run the sprinkler for five minutes.
Calculate your water needs.
- Divide one by how much water you collected.
Let’s say you collected ¼ inch per can.
Ex. 1 / .25 = 4
- Multiply the result by 5
Ex. 4 x 5 = 20
- Your answer (in our example, 20) is how many minutes to run the system to supply one inch of water to your lawn.
That’s it!
If your catch cans were filled unequally or if you see large amounts of water hitting the concrete, adjust your sprinklers so your lawn is watered equally in all areas.
If your sprinkler heads aren’t hitting the concrete but you still notice runoff, your soil may absorb water more slowly. In this case, set the system to come on in intervals to allow the water to sink in and avoid runoff.
Pro Tip: Water efficiency tests aren’t limited to in-ground irrigation systems. Plan to do an audit whether you have an in-ground or hose-end sprinkler.
4. Water wisely (or not at all)
In the spring, you may need to water your lawn infrequently or not at all. Spring is when temperatures are cooler and rainfall is more abundant, so supplemental watering may be unnecessary or infrequent. Many areas of Texas can wait until June to start additional watering.
Not watering until late spring or early summer gives the grass time to develop deep root systems. Watering prematurely will encourage shallow roots. A deep root system is one of the best ways for your lawn to resist disease and remain alive during summer droughts.
Other watering tips:
- Water early in the morning.
- Water your lawn with 1 inch of water per week if it hasn’t rained. Soil type and grass type influence how often you’ll need to water, but in general, you should be able to wait 5 to 8 days between deep waterings.
5. Check the lawn for disease or insect problems
Here are a few things to watch out for from March through May:
March-May
| Grass | Spring Issue | Solution |
| Bermuda | Insects | Look for fire ant problems. Use insecticides or organic controls as necessary. |
| Disease | Watch out for spring dead spot. Don’t use fungicides in the spring. Only use fungicides in the fall as needed. Take-all root rot may be an issue. Proper grass care is the best preventive and curative. Apply fungicides as a last resort. | |
| St. Augus- tine | Insects | N/A – You don’t have to start scouting for chinch bugs until June. |
| Disease | Start scouting for fungi such as take-all root rot and gray leaf spot. Use good grass care to prevent and treat: Water early and infrequently and pick up grass clippings from infected turf as you mow. Aeration and dethatching may be helpful if the soil is compacted or a thick layer of thatch has developed. Apply fungicides as a last resort. | |
| Zoysia | Insects | N/A |
| Disease | Brown patch, leaf spot, and rust are common fungal problems. Water early and infrequently, dethatch if needed, increase light and airflow, and collect diseased clippings as you mow. Follow recommended mowing heights. Apply fungicides as a last resort. | |
| Buffalo | Disease | Low disease potential. |
Proper identification is crucial for successful treatment. Contact an Austin lawn care pro for help identifying turf problems in your lawn.
6. Ready, set, mow!

It may be necessary to mow the lawn to keep winter weeds from going to seed. If weeds are not a problem for you, plan to start mowing once the grass starts to green up in the spring. This is generally in March.
If you haven’t been mowing weeds already, get out the mower and make sure everything is ready to go a few weeks before the grass turns green. If there are engine problems, getting an early start will allow time for you to diagnose the problem, order parts, or be first in line at the lawn mower repair shop.
DIY Mowing Prep:
- Sharpen your lawn mower blade.
- Disconnect the spark plug.
- Grab a wrench to remove the bolt on the blade. Take off the blade.
- Get a paint scraper to remove the built-up gunk on the blade.
- Put the blade in a vice and use a file to sharpen the edge.
- Hang the blade on a nail to make sure it is relatively level. If one side leans too much to one side, take off more metal to make the blade hang level.
- Use an air compressor or paint scraper to remove built-up debris from underneath the deck.
- Put the blade back on the mower.
- Reconnect the spark plug.
- You’re ready to mow!
Mowing the lawn is one of the easiest ways to help your lawn thrive. Mowing at the correct height is an important part of helping your lawn to grow deep roots and collect the right amount of light for food production. For example, St. Augustinegrass likes partial shade, so its wide leaves and tall mowing height help it produce enough food for itself.
Here’s a handy chart with recommended mowing heights for best grass types for Austin yards:
| Grass Type | Mowing Height |
| Bermudagrass | 1-2.5 inches |
| Buffalograss | 3-8 inches |
| St. Augustinegrass | 2.5-3.5 inches |
| Zoysiagrass | 1-3 inches |
The height range helps accommodate the needs of different varieties of grass types and times of the year.
7. Dethatch, and aerate, and topdress, oh, my!
Some grasses, especially bermudagrass, St. Augustinegrass, and Zoysiagrass, can quickly accumulate too much thatch if they receive high amounts of fertilizer and water. If your thatch is above ½ inch, plan to dethatch your lawn before you aerate or topdress it. A verticutting or dethatching machine makes quick work of a large lawn. If you have a smaller lawn, you can use a hand thatching rake.
Austin’s compacted clay soils can benefit from regular aeration and topdressing. May and June (late spring and early summer) are the best times to aerate your yard in Austin. Aerating your lawn is one of the best types of preventive maintenance you can do. Aeration will allow more oxygen into the soil, which helps roots to grow strong and deep and improves water infiltration.
After you aerate, apply a layer of compost or high-quality garden soil on top of the lawn. Even if you don’t aerate, applying a layer of compost as topdressing will, over time, help to improve the level of organic matter and soil health.
8. Fertilize the grass … maybe
All grass needs nutrients to thrive, but take care before you buy a bag of synthetic fertilizer for your Austin lawn. In Austin, applying high levels of nitrogen can attract pests and lead to fungus. If you’d like to apply some fertilizer, wait until you have mowed the grass at least two or three times, which is usually in April. Then use ½ pound of nitrogen per 1,000 square feet of lawn.
If you prefer a natural approach, skip the nitrogen and topdress with compost. Whatever approach you take, leave your grass clippings on the lawn. According to an Austin Extension Office expert, this is the “best way to fertilize during the growing season.”
9. Mulch
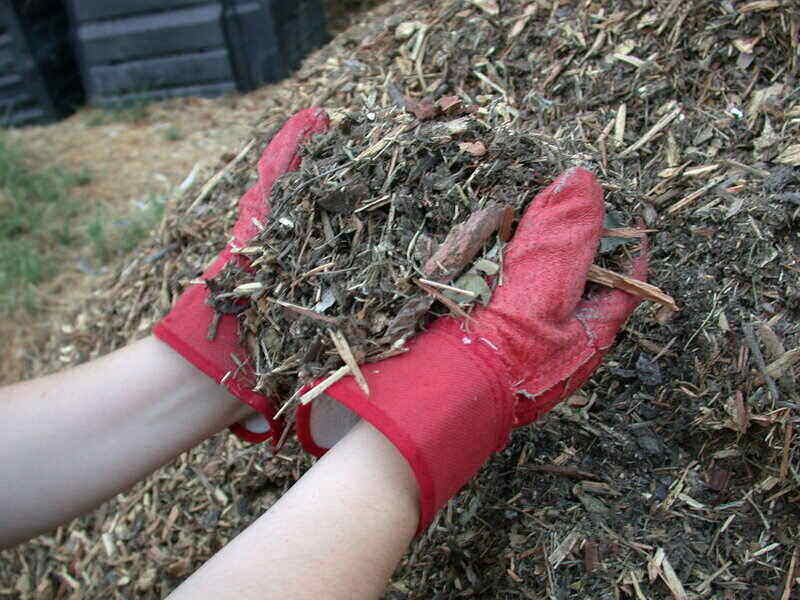
Here are all benefits of mulch for your landscape:
- Saves money by conserving water
- Protects the roots against summer heat and guards the crowns during the cold season
- Reduces weed pressure
- Prevents dirt from splashing on the lower leaves (if you have a sprinkler system)
- Adds nutrients and organic matter as it decomposes
- Helps prevent erosion
You may wonder which mulch is best for your lawn. There are many possibilities, and you can choose from organic or inorganic mulch.
Organic mulches:
- Compost
- Wood
- Pine straw
- Straw
- Sawdust
- Newspaper
Inorganic mulches:
- Rubber
- Plastic
- Rocks
Note: Rubber mulch or wood chips? Organic mulches can provide ideal living conditions for a variety of pests.
Here are tips to tips to avoid pest problem in mulched areas:
- Keep mulch at least 6 inches from your foundation.
- Remove old mulch before you apply new mulch.
- Don’t overdo it: 2 inches of mulch is plenty.
A final tip about mulch in springtime: Wait until the temperatures start to warm to apply your mulch so that it doesn’t hold in cold air next to your plants and trees.
How spring lawn care will pay off
Weeding, dethatching, aerating, and fertilizing in spring sets your lawn up for success through Austin’s hot summer and not-that-much-cooler fall. Through it all you’ll have a lawn that leaves your neighbors green with envy.
If this Spring Lawn Care Checklist seems like too much for you, hire an Austin lawn care pro to take these yard chores off of your hands.
Main Photo Credit: Lars Plougmann | Flickr | CC BY-SA 2.0