Rain gardens are lush, eco-friendly additions to your lawn, and you can design a gorgeous one as a DIY project. However, learning how to plan a rain garden does require some algebra that’ll make you feel like you’re back in middle school. Don’t worry: It’s all straightforward, and the flower-filled results will be worth the scratch paper involved.
In this article, we’ll cover:
- Planning your rain garden
- Step 1: Choose your location
- Step 2: Test your soil
- Step 3: Decide on ponding depth
- Step 4: Test percolation rate
- Step 5: Calculate your garden’s size
- Step 6: Choose your garden’s shape
- Step 7: Decide when to build
- Step 8: Call 811
- Step 9: Start building
- What is a rain garden?
- Why build a rain garden
- Getting your lawn rain-ready
This article guides you through the “before” stage of building a rain garden, so you choose the right location, size, and shape for your garden. Once you’ve finished planning, you can move along to our “How to Build a Rain Garden” article.
Planning your rain garden
Careful planning is key to creating a successful rain garden. The last thing you want is a rain garden that doesn’t drain, hosts mosquitoes, or constantly overflows. Once you have a plan, building a rain garden only takes two to three days.
| Difficulty level | Time | Cost |
| Easy to medium | 2 – 3 days | $500 – $1,600 |
Tools you’ll need for planning your rain garden
- Grid paper and pencil (to sketch out your area)
- Calculator
- Measuring tape
- Soil test kit
- Shovel (to test percolation rate)
- Yardstick with inch marks (to test percolation rate)
- Garden fork (to rough up the soil before testing percolation rate)
- Garden hose or rope (to model your garden’s shape)
- Spray paint (to mark the size and shape of your area)
Step 1: Choose your location
It’s important to plant your rain garden where it will collect storm water runoff, or else it won’t do its job. Look for a natural depression on a gentle slope that catches water from downspouts and hard surfaces such as driveways, roofs, porches, and patios.
When choosing your location, slope is key. You want a slight slope (about a 2% grade), but not too much: Make sure your rain garden isn’t on a sharp decline, or it could collect too much water on one side and overflow.
If your slope is more than a 5% grade (for every 20 feet of horizontal distance, land slopes downward by 1 foot), you’ll need to install landscape fabric to prevent erosion and landslides.
For safety, your slope should not be more than a 12% grade (for every 8 feet of distance, land slopes downward by 1 foot).
Where not to plant a rain garden
- Within 10 feet of your home’s foundation. (You don’t want water to seep into your basement.)
- Within 50 feet of a septic tank if the rain garden is uphill from it, or within 10 feet of a septic tank if the rain garden is downhill from it.
- Within 50 feet of a drinking water well.
- Within 10 feet of a retaining wall.
- Under large trees. (Digging can damage the root system.)
- Near the edge of a steep slope or bluff.
- Anywhere groundwater is within 2 feet of the soil surface.
- In a low spot where excess water pools and does not drain.

Step 2: Test your soil
For optimal plant growth, your soil may need some texture, pH, and nutrient amendments. It’s a good idea to have your soil tested in a lab before launching into any major garden project. Once you have excavated your basin, you can use the results of your soil test to improve your garden soil before planting.
Contact your local extension office for information about where you can get your soil tested.
Step 3: Decide on ponding depth
Maximum ponding depth is the depth that water can pond before it flows out of your rain garden. It’s measured from the deepest part of your rain garden to the elevation of your lawn where water enters your garden.
Based on your soil type and landscape preferences, you’ll want to choose a maximum ponding depth of 6 to 12 inches.
Most homeowners opt for a 12-inch ponding depth to hold more water, especially in areas with poor soil. However, a deeper pond will take longer to drain, so you’ll need to select plants that can tolerate extended wet conditions.
If your lawn has excellent drainage and you’ve chosen a smaller rain garden design, 6 inches may be all you need.
Step 4: Test percolation rate
To check that your location is suitable for a rain garden, perform a percolation test (also known as an infiltration test). A percolation test tells you how quickly your water drains.
It’s important to choose a location with good soil drainage to ensure your rain garden can absorb water within one to three days after a heavy storm. You don’t want mosquitoes taking advantage of standing water!
How to perform a percolation test
- Dig a hole 2 feet deep and 8 to 12 inches wide.
- If you have clay soil, rough up (scarify) the sides of the hole with a garden fork to get an accurate idea of infiltration. If the sides are smoothed over by a shovel, the soil will be sealed off to water, so you won’t get a good idea of true infiltration.
- Hammer in a yardstick with inch markings so you can read the water level.
- Fill the hole with water several times until it doesn’t drain anymore, and then fill it to your desired ponding depth. If you want a 12-inch ponding depth, fill the hole up to the 12-inch mark on the yardstick. If you want a 6-inch ponding depth, fill the hole to the 6-inch mark.
- Check the hole every few hours. Note how many hours it takes for the water to completely drain (either 6 or 12 inches, depending on your ponding depth in the step above).
How to calculate percolation rate
Now, calculate the percolation rate to determine if the area can sustain drainage from a rain garden. It’s an easy formula.
Percolation rate = Inches of water drained / Hours it takes to drain
For example, if you observe that it takes 18 hours for 6 inches of water to drain, your percolation rate would be:
6 inches of water drained / 18 hours= 0.33 inches of water percolated per hour
Is my location right for a rain garden?
Based on your percolation rate, decide if your location can sustain a rain garden.
Soil with a percolation rate of 0.5 inches per hour or more (i.e. it takes 2 hours or less for 1 inch of water to drain) is generally considered “well-draining.”
If your soil’s percolation rate is less than 0.1 inches per hour (i.e. if it takes more than 10 hours for 1 inch of water to drain), choose a different location for your rain garden.
If your soil’s percolation rate is less than 0.25 inches per hour (i.e. if it takes more than 4 hours for 1 inch of water to drain) but over 0.1 inches per hour, your location is suitable. However, during wet months, your rain garden may have standing water. Make sure plants in the bottom of your basin can handle having wet roots for prolonged periods.

Step 5: Calculate your garden’s size
Once you’ve found the perfect location for your rain garden, it’s time to decide how large you want it to be. If you have a single-family home, your ideal rain garden size will likely be 150 to 400 square feet.
To calculate the best garden size for your lawn, take a look at your house and surrounding impervious surfaces (driveways, sidewalks, parking lots, etc.).
Ask yourself: Which surfaces will contribute stormwater runoff to my rain garden? These surfaces are known as contributing surfaces. Enlist your family and friends to help you measure their lengths and widths using a tape measure.
How to determine idea garden size
Once you’ve measured all your contributing surfaces, follow these steps to determine your garden size:
1. Calculate the area of all contributing surfaces. Then add up all the areas for a grand total.
Area of a surface = Length x Width
Example: You’ve determined that your driveway and two east-facing rooftops will contribute runoff to your rain garden.
Driveway area: 10 feet long x 20 feet wide = 200 square feet
First rooftop area: 15 feet long x 30 feet wide = 450 square feet
Second rooftop area: 18 feet long x 20 feet wide = 360 square feet
Total area of driveway and the two rooftops: 200 square feet + 450 square feet + 360 square feet = 1,010 square feet
Your total contributing area will be 1,010 square feet.
2. Determine your sizing factor percentage.
As a general rule, your rain garden’s area should be 10% to 20% of the contributing area. This percentage is called the sizing factor percentage because it determines the size of your rain garden in relation to your impervious surfaces.
Your sizing factor percentage is based on your soil quality, region, and desired drainage. It’s a good idea to contact your local cooperative extension office for guidance about the best percentage for your lawn.
3. Calculate the ideal area for your rain garden.
Use this formula to find the area of the bottom of your rain garden basin:
Total contributing area x Sizing factor percentage = Area of rain garden
Example:
Continuing from our 1,010 square foot area example, let’s use 15% (0.15) as our sizing factor percentage. It’s a standard percentage for homeowners.
1,010 square feet x 0.15 = 151.5 square feet for the rain garden’s area
The flat bottom of your rain garden basin should measure 151.5 square feet. This means that your rain garden should have length and width dimensions that multiply to approximately 151.5 square feet.
4. Factor in a berm.
During heavy rain, your rain garden may be in danger of overflowing. You need a watertight berm (a 6- to 8-inch wall of compacted soil around the sides of your garden) to prevent water from spilling out. When you’re planning the size of your garden, don’t forget the width of the berm.
Your berm should be twice as wide as it is high, so if your berm is 8 inches high, it should be 16 inches wide.
Pro Tip: To keep your rain garden safe from damage, never send more than 1,000 square feet of impervious surface water to one rain garden. If the total area of your impervious surfaces is more than 1,000 square feet, build multiple rain gardens in different areas of the yard.
Step 6: Choose your garden’s shape
Get your creative juices flowing! Based on your desired aesthetic and the natural shape of your lawn, choose a garden shape that makes your landscape pop. Ovals, kidney beans, and teardrops are some of the classic homeowner favorites.
Choose your garden’s dimensions with the total area in mind. Let’s say your garden’s total area is approximately 150 square feet. For an elegant elongated teardrop shape, you can opt for a length of 14 feet and a width of 11 feet. For a long, wavy design, choose a length of 19 feet and a width of 8 feet.
A good rule of thumb is to make your rain garden twice as long as it is wide, so the longer side is perpendicular to your downspout or rainwater source. With the longer end of your garden facing your house, your garden will collect the maximum amount of water during a storm.
Use a rope or garden hose to model different shapes before you dig. Once you’ve selected your perfect shape, spray paint an outline to follow as you excavate.
Step 7: Decide when to build
You can build a rain garden any time from spring to fall. Many homeowners prefer spring because it gives flowers time to blossom.
Don’t try to dig during particularly rainy periods because excavating soggy soil can cause soil compaction. And don’t try to build in the height of winter, as cold soil will make excavation difficult and winter soil disturbances can cause erosion problems down the road.
Step 8: Call 811
Before digging, check that you won’t accidentally hit an underground utility line. Calling 811 is an easy, free way to make sure you don’t cut off your neighborhood’s power or hit a gas line. Call at least three days before you dig so utility companies can send out locators to mark where utilities are buried.

Step 9: Start building
Power off your calculator and recycle that scratch paper. You’ve made it to the fun part! Now that you have all your initial calculations out of the way, you can get to work on your lovely, eco-friendly creation.
Here’s a preview of your next steps:
- Remove grass
- Excavate the basin
- Install inflow (swales or pipes) and overflow
- Build a berm
- Amend or replace your soil
- Add rain garden plants (like sedges, native grasses, wildflowers, and other perennials)
- Decorate with mulch and hardscape features
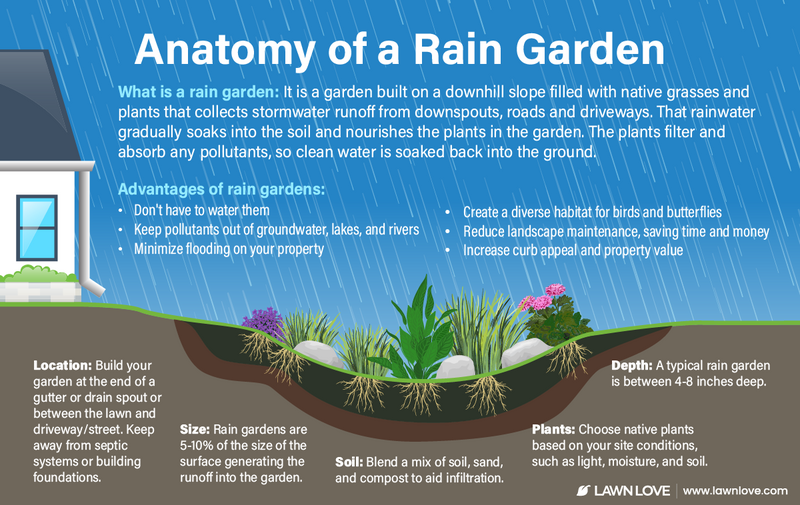
What is a rain garden?
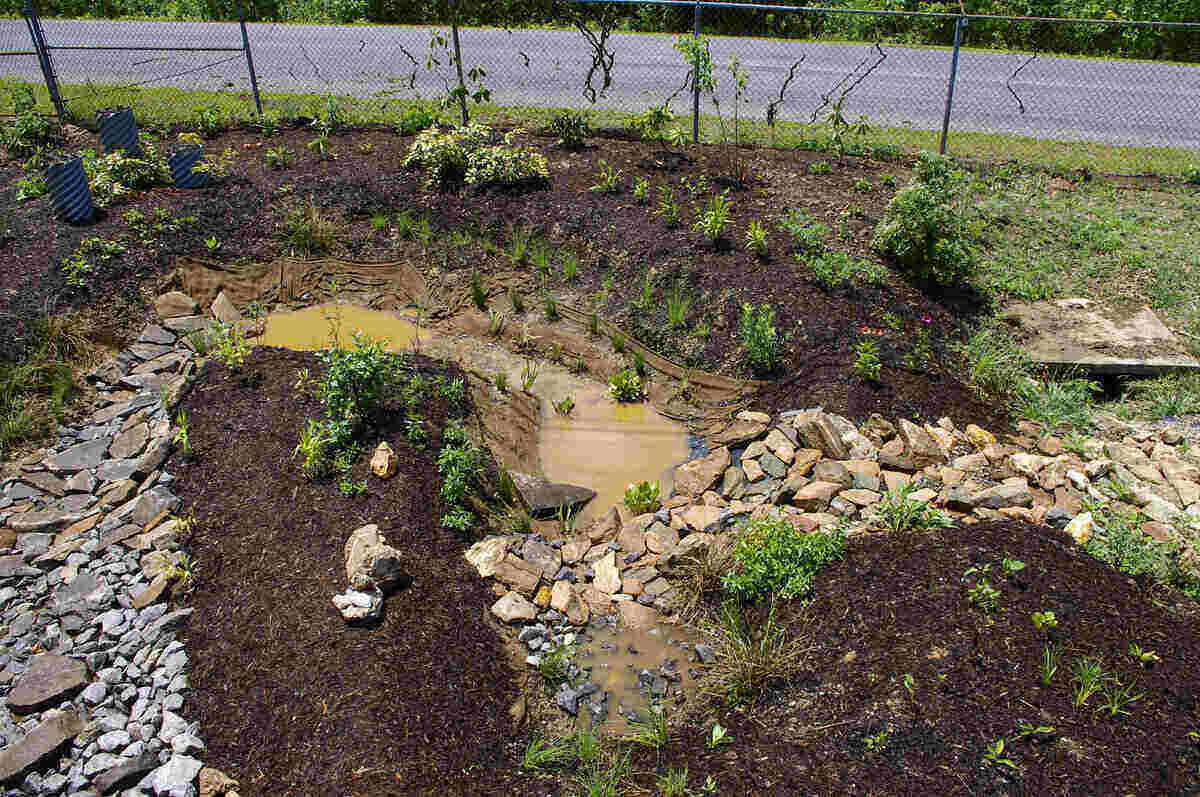
A rain garden (aka bioretention cell) is a basin filled with native plants, rocks, and permeable soil. It’s designed to capture and hold stormwater runoff flowing away from your house.
The problem with water runoff
During storms, rainwater rushes from hot roofs and driveways across your lawn, picking up pollutants like fertilizer, pesticides, and sediment. It reaches the storm drain and flows right into local lakes, rivers, and other bodies of water.
Hot, polluted stormwater shocks animals and plants in those ecosystems and causes algal blooms and dead zones (areas with low oxygen where plants die and animals either die or lose their habitat). Algal blooms and dead zones don’t only affect aquatic organisms: Toxins can contaminate drinking water, harming humans and pets.
The rain garden solution
Rain gardens stop and hold fast-flowing runoff so it can’t reach your surrounding ecosystem without first getting filtered. Compost-heavy soil and plants with deep roots absorb the water, clean out contaminants, and let the water slowly filter into the surrounding soil.
By the time stormwater reaches rivers and streams, it’s clean and won’t hurt wildlife.
Why build a rain garden
Some of the benefits of rain gardens:
- Prevent home water damage and flooding
- Relieve some of the strain on your town’s storm sewer system
- Improve water quality and protect the environment from pollutants
- Protect aquatic life from sudden water temperature changes
- Recharge groundwater
- Offer visual appeal
- Require little maintenance
- Can increase property value
- Attract butterflies, bees, and other beautiful pollinators
Getting your lawn rain-ready
With the right planning, you’ll have a gorgeous, pollinator-friendly garden that drains water within 72 hours of a storm, so you can enjoy the rain outside your window without worrying about your basement getting wet.
If algebra is your least favorite subject or if you’d rather not spend the day digging and measuring your lawn, call a local lawn care team to start your garden off strong.
Main Photo Credit: wes hill | Flickr | CC BY-SA 2.0