
It doesn’t matter if they’re in your lawn, your vegetable patch, or your prized rose garden—weeds are a major nuisance and often really challenging to get rid of. So we’ve rounded up 14 ways to kill weeds permanently, once and for all, so they won’t come back next season. We cover traditional, organic, and unconventional methods.
This article discusses why the following methods work and how to kill some of the most common lawn weeds and any others that dare take up residence in your yard.
- 1. Apply a chemical herbicide
- 2. Apply an organic herbicide
- 3. Use a pre-emergent herbicide as a preventative
- 4. Pull weeds by hand
- 5. Get a weed burner
- 6. Smother weeds to stop growth
- 7. Use vinegar to dry weeds out
- 8. Pour boiling water on the weeds
- 9. Use corn gluten meal as a pre-emergent
- 10. Dump salt on the weeds
- 11. Sprinkle baking soda
- 12. Use a rubbing alcohol solution
- 13. Spread mulch across the ground
- 14. Plant ground covers
- FAQ about killing weeds permanently
1. Apply a chemical herbicide
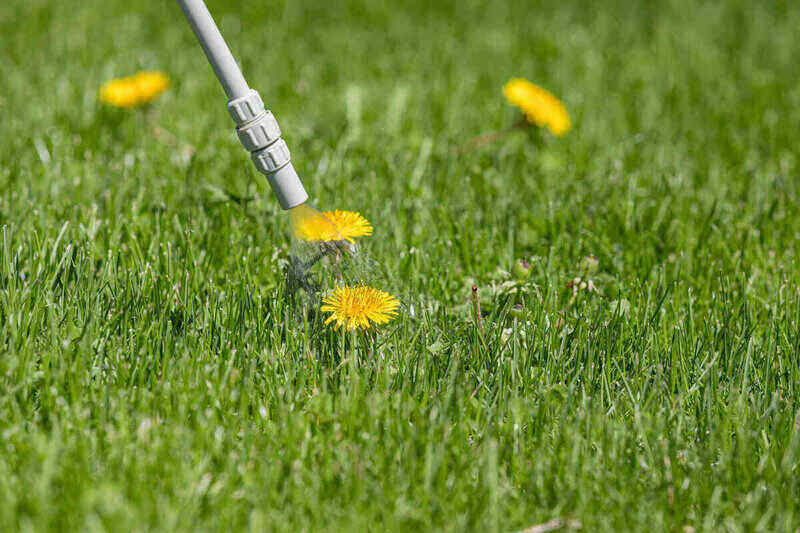
Coming in first on the list is using chemical herbicides. While these products have some drawbacks, they are a tried and true method for killing weeds and the first option many people choose.
Chemical herbicides work by disrupting biological processes within the plant, ultimately resulting in its death. They contain manufactured synthetic ingredients. Many products are available, so understanding the fundamental differences is critical.
Selective vs. non-selective herbicides
Selective herbicides target a specific plant type, e.g. broadleaf or grassy weeds. These products are great for treating broadleaf weeds in your lawn, as they won’t damage the grass. Or you can use a product for grassy weed control in your garden and not worry it will harm the tomatoes.
Non-selective products are indiscriminate and kill all plants. Glyphosate (commonly sold as Roundup) is the most familiar non-selective herbicide.
Just my opinion, but I think non-selective glyphosate is one of the best weed killers for stubborn weeds like crabgrass and bindweed.
Contact vs. systemic herbicides
Contact herbicides only work on the plant tissue they touch. They work quickly but don’t usually kill the entire plant and may need multiple applications to be effective.
Systemic herbicides are absorbed into the plant’s leaves and move through the vascular system. Because of this, they take longer to work, but they kill the whole plant, even the root system.
Directions for using a chemical herbicide
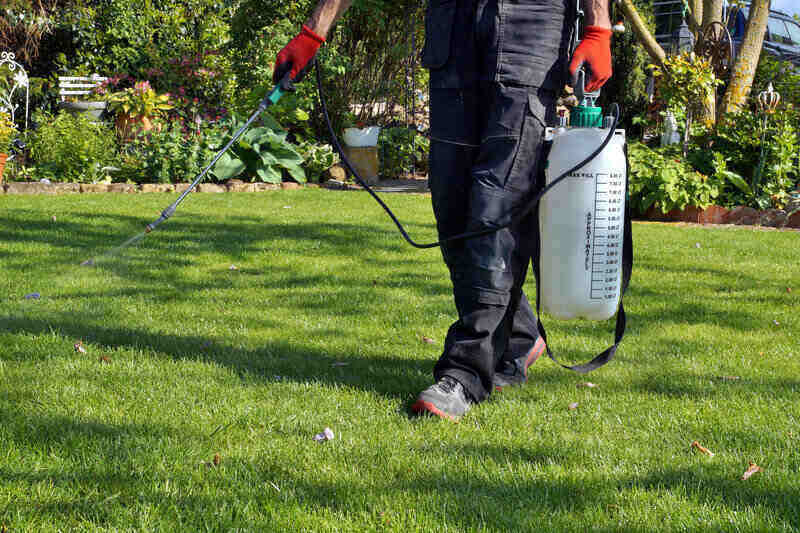
Regardless of which herbicide you apply, always follow the label directions and safety recommendations. Wear protective clothing, only apply to the weeds you wish to kill, and spray when there is minimal wind to avoid product drift.
You may need to respray weeds to kill the entire plant. Wait the recommended time before spraying again.
2. Apply an organic herbicide
Organic herbicides work differently than chemical herbicides and are rapidly gaining popularity with gardeners. They have lower toxicity levels and break down much quicker than traditional herbicides, posing fewer environmental and health risks.
These products contain natural ingredients that remove the waxy coating on plant leaves or damage cell walls. As a result, the plant dries up or dies.
However, significantly fewer organic products are available for sale, limiting your options.
The most popular organic herbicides include:
- Weed Pharm (20% acetic acid)
- C-Cide (5% citric acid)
- GreenMatch (55% d-limonene)
- Matratec (50% clove oil)
- WeedZap (45% clove oil + 45% cinnamon oil)
- GreenMatch EX (50% lemongrass oil)
- Avenger Weed Killer (70% d-limonene; the first EPA-approved, OMRI-listed product)
- A.D.I.O.S. Organic Herbicide and Weed Killer (96% sodium chloride)
A.D.I.O.S. is one of the only selective organic herbicides that kills broadleaf weeds but won’t harm grass. Most of the other organic products are non-selective and kill anything they touch.
Directions for using an organic herbicide
Even though organic herbicides contain naturally occurring ingredients, you still should always follow label directions and apply the products carefully. Wear protective clothing, spray when there is minimal wind, and only apply to the weeds you want to kill.
3. Use a pre-emergent herbicide as a preventative
Pre-emergent herbicides are slightly different than the two I just talked about. Instead of applying one after you see weed growth, a pre-emergent herbicide is put down before the new weeds germinate. They don’t stop germination but mess up growth processes so the weed sprouts die and never push through the soil surface.
Directions for using a pre-emergent product
The one challenge with pre-emergents is getting the application timing right. The goal is to scatter them across the soil just as temperatures warm up but before weed seeds germinate. Use them too late, and they’re entirely useless. But if you put them down too early, they could degrade and won’t work when it’s time for germination.
Usually, late winter or early spring is the best time to apply. A general rule of thumb is to apply them when the forsythia bushes start blooming.
Check out our list of the best pre-emergent herbicides for home use for recommendations. And, as always, follow the application rates listed on the label and wear protective clothing when working with these products.
4. Pull weeds by hand

Pulling weeds by hand effectively kills weeds without harming other nearby plants or the surrounding lawn. While time-consuming, when you use a natural method like this and yank a plant out of the ground and toss it into the trash, there isn’t any way it can survive.
When dealing with garden weeds, I like to pull them by hand and avoid using any chemicals in my vegetable garden.
Directions for pulling weeds by hand
The key to pulling weeds manually is to make sure you remove the entire stem from the ground. If you snap the stem and there are roots underground still, the weed will regrow.
Water the soil around the weed or weeds you want to pull a day or two ahead of time. The damp ground makes this job much easier. Then, use a long flathead screwdriver or a specialized weed popper tool to remove the plant, stem, and all, down to the roots.
5. Get a weed burner

Flame weeding is a fantastic way to kill weeds permanently. It’s as effective as herbicides and manual weeding and has many advantages.
The heat boils water in the plant’s cells, causing them to burst. It essentially destroys the cell structure in the leaves, so the plant can’t photosynthesize and dies. If the stem is burnt, water and nutrients can’t move from the roots to the top of the plant, killing it.
Directions for burning weeds
I’ll admit that, while this isn’t the safest weed control method, it’s undoubtedly one of the most fun!
My property backs up against a huge field, so I get many thistles and quackgrass in my garden and flowerbeds. Instead of spraying weed killer or spending hours hurting my back pulling weeds, I use a cheap burner I bought from a local, low-cost tool retailer.
You’ll need a weed burner (aka, a flame thrower!) and a propane tank. I typically just pull the one off my grill. Hook the weed burner up to the tank and follow directions for igniting the flame. Use the trigger on the wand to increase the flame intensity, directing it at the weeds. I typically burn them until the leaves go from shiny to a matte finish and the leaf edges blacken.
Pro tip: Keep the hose handy when you’re burning weeds. You don’t want an unwanted call to the fire department because you set your fence or the neighboring field on fire.
6. Smother weeds to stop growth

Covering weeds with plastic or cardboard deprives the plants of sunlight and oxygen, and they stop growing because of an inability to photosynthesize.
Directions for smothering weeds
Smothering is a slow process, so plan on giving it a few weeks to clear an area. But it’s a fantastic method for large areas. Remember that you’ll kill almost everything underneath your smothering material. So, this method is best if you’re looking to clear out a garden plot or flower bed or are killing off a section in your lawn that you plan on reseeding.
Place a garbage bag, newspapers, plastic sheeting, or cardboard over the weeds you want to smother. If you’re using a garbage bag or plastic, try to use black since it’s best at blocking the sunlight. Secure the corners with rocks or landscape stakes to keep the material from blowing away.
Pro tip: I recommend avoiding landscape fabric for this project. I think it falls apart way too quickly, and it’s considerably more expensive.
After a few weeks, everything should be suffocated and dead. Pull the plastic up or leave the newspaper or cardboard to decompose.
7. Use vinegar to dry weeds out

The active ingredient in vinegar is acetic acid, a weak organic compound. It’s the active ingredient used in some of the most popular organic herbicides.
Acetic acid is known for its affinity for hydrogen bonding and works by pulling the water molecules out of plant cells. This hydrogen bonding causes the cell walls to rupture and dehydrates the weed, killing it.
Directions for using vinegar as a weed killer
There are a couple of different ways you can use vinegar as a weed killer. You can use it straight or mix it with other products to create an herbicidal soap.
When undiluted, pouring a small amount of white vinegar into a spray bottle is easiest. The spray bottle lets you apply it generously while still having great control over the application. Because the vinegar will kill grass and any other desired plants it touches, be sure to spray it only on the weeds you want to kill.
A quick look online yields many different vinegar-based homemade weed-killer concoctions:
- Mix 1 gallon of household vinegar, 1 tablespoon of dishwashing soap, and 1 cup of salt.
- Combine four parts water with one part vinegar, adding about an ounce of dish soap.
- Mix 1 gallon of vinegar with 1 ounce of dish soap.
You can use whatever vinegar you have on hand, whether white or apple cider.
No matter the DIY recipe you use, mix the ingredients well and use a spray bottle to coat the weed. The dish soap causes the mixture to stick to the plant instead of dripping off.
When using vinegar, avoid rainy or windy days to keep the solution from diluting or drifting, and try to do it on a warm, sunny day. The heat and sunshine will speed up the process.
8. Pour boiling water on the weeds
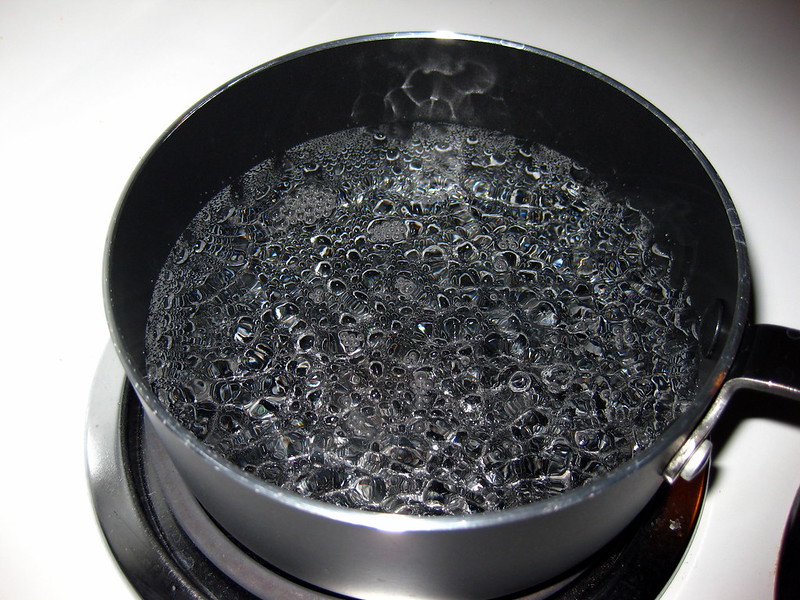
Like flame weeding, the heat of the boiling water destroys plant cells in the leaves, causing the weed to stop photosynthesizing and die. This method is the most effective on young weeds just after they emerge from the ground.
I like to use boiling water on the weeds that poke up in my driveway or in the expansion joints of my walkways or patio. Boiling water will kill any plant it touches, so it’s not great for weeds in the lawn or garden.
Directions for using boiling water to kill weeds
Boil water in a teapot or large pot on your stove, or heat water in an electric kettle (my preferred method). Once the water starts bubbling, carry the kettle or pot outside and pour the hot water onto the weeds you want to kill.
Be careful not to scald yourself and avoid getting the hot water on other vegetation.
9. Use corn gluten meal as a pre-emergent

Surprisingly, corn gluten meal has been used as a natural weed killer for over 30 years. When applied to the soil, it releases dipeptides (organic compounds) that dry out weed seeds, making it hard for them to sprout.
Directions for using corn gluten meal on weeds
Use a drop or broadcast spreader and apply about twenty pounds of corn gluten meal per 1,000 square feet for the best results. Note that corn gluten meal is a pre-emergent, which means it doesn’t kill weeds that have already sprouted but prevents new ones from growing.
10. Dump salt on the weeds

Salt kills weeds via sodium toxicity. As you might know, the chemical makeup of table salt is sodium chloride. While plants need chloride for growth, they don’t need sodium. So when the salt’s sodium gets inside a plant, it builds up to toxic levels.
The excess salt pulls water from the plant’s tissues, drying it out and ultimately causing death. Salt in the soil also impedes the weed’s ability to take in water through its roots.
Directions for using salt as a weed killer
You can sprinkle salt directly on any weeds you want to kill. I like to cut the top of the weed off and dump salt right onto the exposed stem.
If you want to spray it onto the plant, add about two cups of salt to a gallon of water. You can spray it as necessary or dump it on the weeds and the surrounding soil.
One thing to note when using salt as a weed killer is that, depending on how you use it, it can take the soil some time to recover afterward. If you plan on growing other vegetation in that area, focus the application on the weeds, not the soil.
11. Sprinkle baking soda

Baking soda is commonly used to kill weeds, fungus, and moss. It works similarly to salt, as its chemical makeup is sodium bicarbonate. The sodium causes desiccation of the weeds it’s applied to, killing them.
Directions for using baking soda to kill weeds
Wet the area first by spraying down the plant and watering the soil with your garden hose. Then, sprinkle baking soda directly onto the weeds and the surrounding soil. Repeat as necessary.
12. Use a rubbing alcohol solution
Like salt and baking soda, rubbing alcohol pulls the moisture from weeds and soils, desiccating them. In this case, it’s the high alcohol content that causes problems, as the alcohol has a high affinity for binding with water.
Directions for using rubbing alcohol to kill weeds
Straight rubbing alcohol by itself is harsh, so using it without diluting it down is not recommended. Instead, mix a solution of one quart of water and two tablespoons of isopropyl alcohol. Add a few drops of liquid soap to act as a surfactant if you want.
Put the mixture into a spray bottle and thoroughly drench the weeds, avoiding contact with nearby plants. Try to use this method on a warm, sunny day versus cloudy or rainy.
13. Spread mulch across the ground

Using mulch to kill weeds is effective and has many other benefits for the plants you want to keep. Plus, it helps make your flowerbeds and gardens look lovely.
Mulch suppresses the germination of some weed seeds by blocking sunlight, which hinders photosynthesis. When plants don’t photosynthesize, they don’t make the carbohydrates needed for growth and other metabolic processes. Without chemical “food,” they can’t grow.
It can also smother newly emerged plants, blocking them from getting the sun’s energy and sometimes even oxygen.
Directions for using mulch
Spread a 3 to 4-inch layer of bark chips, straw, finished compost, leaves, or any other type of mulch across the soil surface. Keep it a few inches from tree trunks and the stems of your garden veggies or ornamental plants.
14. Plant ground covers

Planting ground covers is another way to shade the soil surface and keep weed seeds from germinating and out-competing your grass and plants for resources like sunlight. Over time, the weed seedlings will struggle and die off.
Some of the best ground covers are easy to maintain, yet they grow nice and thick to create a dense blanket of weed protection. These include:
- Autumn Goldenrod (Solidago sphacelata)
- Blue Wood Sedge (Carex flaccosperma)
- Catmint (Nepeta x faassenii)
- Coral Bells (Heuchera americana)
- Lady’s Mantle (Alchemilla mollis avai)
- Leadwort (Ceratostigma plumbaginoides)
- Liriope (Liriope spicata)
- Little Bluestem (Schizachyrium scoparium)
- Northern Dropseed (Sporobolus heterolepis)
- Salvia (Salvia nemorosa / S. sylvestris)
- Two-row Stonecrop (Sedum spurium)
- White Heath Aster (Aster ericoides)
Directions for planting ground covers
Chances are you already know how to plant something in your yard, but if not, it’s pretty simple. Dig a hole roughly twice as deep as the roots of your new plant and about one and a half times as wide. Drop the plant into the hole and backfill with the dirt you removed when digging. Periodically tamp the soil with your hands to remove any air pockets.
When planting, follow the recommended spacing guidelines on the plant tag, or put them ever so slightly closer (by a couple of inches – let’s not get crazy) to get a nice, thick covering when they mature.
FAQ about killing weeds permanently
What is the strongest thing to kill weeds?
Glyphosate is the strongest weed-killer chemical available for purchase by the general population. It kills everything it touches. Most homeowners don’t need to use a product this strong. Many other chemicals are available that are less toxic, but they are targeted to specific weeds and are nearly as effective.
How do you kill weeds without harming your grass?
The best way to kill weeds without harming your grass is to purchase a selective herbicide targeting broadleaf weeds. It will kill the unwanted dandelions or thistles, leaving your turf alone. You can also pull weeds out by hand to protect your grass.
When to call a weed control pro
Struggling with weeds in your yard, and even with these methods, you just can’t control them? Or maybe you don’t have the time or energy to try? Either way, Lawn Love has you covered! Through our convenient online platform, we can connect you with a weed control pro in your area who’s licensed, insured, and eager to help your lawn or garden look its best.
Main Photo Credit: Merrimon | Canva Pro | License