
Dead patches and bare spots ruin your lawn’s appearance, but fixing patchy grass is straightforward with the right approach.
You have two main options: reseeding, which is affordable but takes 8-plus weeks, or installing sod patches, which provides instant results but at a higher cost. This guide covers both methods so you can choose what works best for your timeline and budget.
If you’re still not sure you’re up to the task and want the job done right, consider hiring a pro.
What’s causing your patchy grass?

Before you fix patchy grass, identify what’s killing it. Otherwise, bare spots will return. Common causes include:
Lawn pests like white grubs and chinch bugs feed on grass roots and blades, creating irregular dead patches that expand over time.
Diseases such as dollar spot and brown patch thrive in humid conditions and can quickly spread across your lawn if left untreated.
Poor lawn care practices contribute to patchy grass more than most homeowners realize. Mowing with dull blades tears grass rather than cutting it cleanly, overwatering drowns roots and promotes disease, and applying too much fertilizer can burn your turf.
Soil issues like compaction prevent water and nutrients from reaching grass roots, while improper pH levels and nutrient deficiencies starve your lawn of what it needs to thrive.
Physical damage from heavy foot traffic, pet urine’s high nitrogen content, and vehicles parked on grass all create dead zones that won’t recover without intervention.
Address these issues before repairing. Treat active lawn diseases, eliminate pests, and test soil to identify pH or nutrient problems.
Fixing patches with seed

First off, timing matters. Cool-season grasses such as Kentucky bluegrass, fine fescues, tall fescue, and perennial ryegrass should be planted in late summer, early fall, or spring. Warm-season grasses like Bermudagrass, centipedegrass, and St. Augustine are best planted during late spring or early summer.
What you need: Soil test kit, grass seed (matching your lawn type), seed spreader, garden rake and hand cultivator, lawn mower, straw mulch, hose with mist attachment, starter fertilizer (optional).
Step 1. Test and amend your soil. Your turf could be patchy because of poor soil. A soil test will show if it’s too acidic or too alkaline and if it’s missing important nutrients like nitrogen, phosphorus, or potassium.
You can fix problems by amending the soil. Add lime to make soil less acidic, sulfur to make it more acidic, compost to improve soil quality, or gypsum for clay soil. What you need depends on your test results. If your soil is low on nutrients, apply starter fertilizer or compost right before or right after you plant your grass seed.
Step 2. Mow existing grass very short. In most cases, scalping your lawn is a big no-no. However, it’s a necessary step if you’re reseeding a part of your lawn. Cutting most of the grass blades will promote better seed-to-soil contact. Mow thinning patches as low as you can. Make sure to bag your clippings afterward so you have a clean area to plant your grass seed.
Step 3. Clear debris and remove weeds. Next, clear the thinning and bare patches on your lawn thoroughly. Rake up any dead grass, rocks, twigs, and leaves. You also may want to check your lawn for excess thatch. If your thatch layer is more than one-half inch thick, it’s time to dethatch your lawn.
You should also kill weeds that are in the patchy parts of your yard. If you can hand-pull them, do so. Just take care to uproot the whole weed, roots and all. Only use a post-emergent weed killer if you have no other choice, as it can interfere with your new turf’s growth. Avoid using pre-emergent herbicides as they can prevent your grass from sprouting.
Step 4. Break up and level the soil. Next, you should break up the soil, especially if the dirt is hard. Moist soil is easier to break up, so soak it a few days beforehand. Use your rake, shovel, or hand cultivator to break up the top 1 to 2 inches of soil.
After breaking up the soil, use the back of your shovel or rake to smoothen the soil and make it level. If it’s still not level, you may need to add topsoil.
Step 5. Spread grass seed evenly. It’s important that you spread the seeds as evenly as possible so all the seedlings have enough space to grow. Adjust the spreader according to the application rate (seeding or coverage rate) listed on your grass seed label. You may need to divide this number by half if you’re seeding an area with grass.
Coverage rates for common grass seeds:
| Cool-season grasses | lbs. per 1,000 sq. ft. |
| Kentucky bluegrass | 1-2 |
| Fine fescues | 4-6 |
| Tall fescue | 7-9 |
| Perennial ryegrass | 7-9 |
| Warm-season grasses | lbs. per 1,000 sq. ft. |
| Bahiagrass | 7-10 |
| Bermudagrass (common) | 2-4 |
| Centipedegrass | 0.25 |
Note: St. Augustinegrass can’t be grown from seed, you’ll need to use sod or plugs instead. Zoysiagrass is difficult to grow from seed and is typically installed as sod.
Step 6. Rake seeds into the soil and add mulch. Next, lightly rake in the seeds to ensure good seed-to-soil contact. To protect your seeds against birds, you can cover your newly planted seeds with a very thin layer of straw or light mulch. This also helps the seeds retain moisture.
Step 7. Water thoroughly and consistently. Lastly, water your seeds thoroughly. You want to get the top 4 to 6 inches of soil wet but not waterlogged. Seeds need water to germinate, but too much can cause them to rot.
Use a hose with a mist attachment to water your seeds so they don’t wash away. Make sure to water the seeds for 10 to 15 minutes two or three times a day, depending on the weather conditions. Do this for the first two weeks, then gradually lengthen the watering sessions but reduce the frequency.
Fixing patches with sod

Laying sod is more expensive than seeding, but it’s also faster and offers more flexibility in terms of timing. You can lay sod anytime throughout its active growing season, but make sure you do it at least six weeks before the first hard frost so it develops the deep root system required to survive winter.
What you need: Sod, soil test kit, measuring tape, garden rake, shovel or landscape edger, stakes and string, topsoil or compost, starter fertilizer (optional).
Step 1. Test and amend your soil. As with planting grass, test your soil before laying sod to rule out improper soil pH levels, nutrient deficiencies, and other soil problems that might harm your new sod.
Step 2. Measure the bare spots. Measure each patch, then cut the sod patches a little larger than the bare spots they’ll be covering.
Step 3. Mark and clear the installation area. Lay the sod over the bare spots and use stakes and string to mark the edges. This shows you exactly where to cut. Remove everything inside the marked area with your shovel or landscape edger – dead grass, weeds (root system and all), and debris.
Cut out a square section that includes both the dead grass and some healthy grass around the edges for a seamless repair. If your thatch layer is too thick, dethatch your lawn before installing sod.
Step 4. Level the soil surface. Remove excess soil so the sod will sit flush with the surrounding turf. Fill in low spots with topsoil or compost. Loosen compacted soil with a rake, aerate if necessary. Use the back of the rake to level the surface. You don’t want to lay sod down on an uneven surface, or else it will stick out like a sore thumb.
Step 5. Install sod patches. Lay the sod pieces into the prepared areas. Press down firmly by stepping on the sod repeatedly. You want good sod-to-soil contact to promote healthy root growth.
Step 6. Water deeply and frequently. Water immediately after installation, soaking the top inch of soil. Just like with new grass seed, sod needs to be kept moist. While it has roots, they’re not deep or strong enough to support itself easily.
Make sure the soil is just moist, not waterlogged. The roots of your new sod may rot otherwise. Water your new sod once or twice a day for 15 minutes. Keep this up for the first 7 to 10 days, then gradually lengthen the sessions but reduce the frequency.
New Grass Maintenance: First 8 Weeks
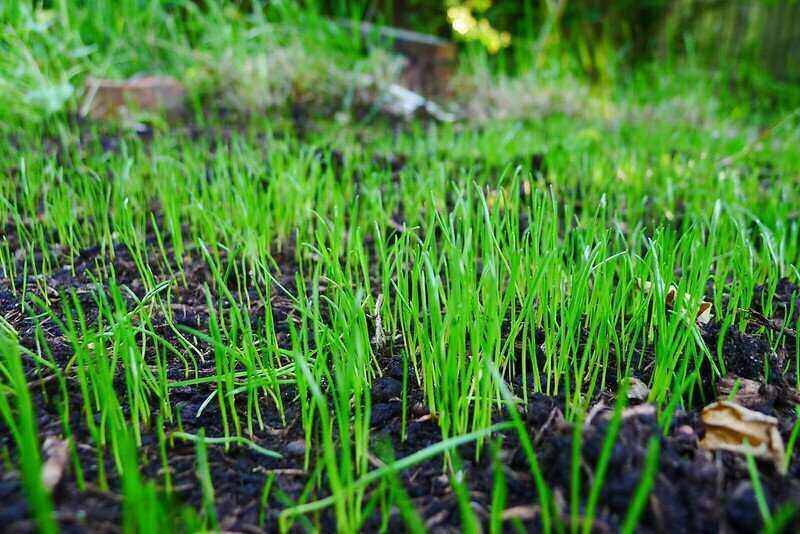
New grass needs a lot more care and attention than established lawns do. New grass has to be watered very often. This is especially true if it’s planted from seed, as it takes much longer for the seedlings’ roots to grow strong and deep enough.
Watering Schedule
| Timeline | Seeded Grass | Sod |
| Weeks 1-2 | 10-15 minutes, 2-3x daily to keep soil moist during germination | 15 minutes, 1-2x daily to keep top inch of soil moist |
| Weeks 3-4 | 20-30 minutes, 2x daily as seedlings grow roots | 20-30 minutes, 1x daily as roots establish |
| Weeks 5-8 | 20-30 minutes every other day as grass establishes deeper roots | 20-30 minutes every 2-3 days, transitioning to normal schedule |
| Weeks 9+ | 1 inch per week split into three 20-minute sessions | 1 inch per week split into three 20-minute sessions |
Only mow after the grass is tall enough. Wait until the new grass patches are 3 to 4 inches tall before mowing them. Waiting until they’re any higher than this risks mowing more than one-third of the grass blade.
Avoid using weed control products. It’s best to deal with weeds before addressing dead, bare, or thinning patches of grass on your lawn, but sometimes they worm their way into your lawn.
Consider hand-pulling weeds in your new grass patches, as you shouldn’t use weed control products on your new grass. If you must use post-emergent herbicides on your lawn, wait until the grass has been mowed three to four times and split the recommended dose into two, using half of the dose.
Avoid walking on the grass. Lastly, minimize foot traffic while your grass is still young or, in the case of sod, before it’s established. It can take up to two months for grass grown from seed to establish. How long does it take for sod to establish? It can take as little as two weeks to as long as six weeks for sod to establish.
FAQs
Some grasses can fill in bare patches on their own. Those that spread through stolons (above-ground stems) and rhizomes (below-ground stems) have a better chance of filling in the gaps on their own. Bermudagrass in particular is very good at filling bare spots. Bunch-type grasses like tall fescue and ryegrass won’t spread, they require reseeding.
If you have an extremely patchy lawn with more than 50% bare spots, it may be worth starting over instead of trying to overseed. Consider full lawn renovation, professional lawn installation, or hydroseeding as a cost-effective middle ground.
DIY seeding costs between $0.07 and $0.23 per square foot for materials (seed, topsoil, mulch, fertilizer). DIY sod costs between $0.20 and $1.05 per square foot for materials only, depending on grass type.
Professional seeding for small patch repairs starts at around $150, with costs varying based on lawn size and condition, while professional sod installation costs $1.70 to $2.60 per square foot installed.
Want a detailed estimate? Check out our guides on lawn seeding costs and sod installation costs, or get free quotes from local pros near you.
Get ready for a patch-free lawn
Patchy grass is an eyesore that can be fixed relatively easily, but it’s even easier to prevent. Fixing patchy grass comes down to two straightforward options: reseeding for budget-conscious homeowners who can wait 8+ weeks, or installing sod for instant results. Either way, the key is identifying what caused the patches in the first place – whether it’s pests, disease, soil problems, or poor lawn care practices – and addressing those issues before you repair.
If you don’t have the time to repair or keep up with a struggling lawn, get some help. Lawn Love connects you with experienced local lawn care professionals who can diagnose the root cause of your patchy lawn, treat pests, test and amend soil for optimal grass health, install sod or seed with proper site preparation, and provide ongoing maintenance to prevent future bare spots.
Main Image: Patchy Lawn with Dry Brown Grass in a Lawn. Image Credit: GreenThumbShots / Adobe Stock
Related Posts:


