A lush lawn transforms your outdoor space into a vibrant oasis, and it all starts with the careful planting of grass seeds. Whether you are looking to rejuvenate your existing lawn or you are a first-time homeowner embarking on the journey of creating a new turf, mastering the art of planting grass seed is essential.
Discover how to plant grass seed and uncover each step of the process. From selecting the right turfgrass seed to preparing the soil, sowing the seeds, and nurturing your lawn, say goodbye to a patchy, uneven lawn and hello to a landscape that’s the envy of your neighborhood.
How to plant grass seed
Growing grass and planting grass seed may seem like simple tasks, but achieving a thriving, carpet-like lawn requires attention to detail and a well-executed strategy that includes a few simple steps.
Select the best grass seed for your lawn
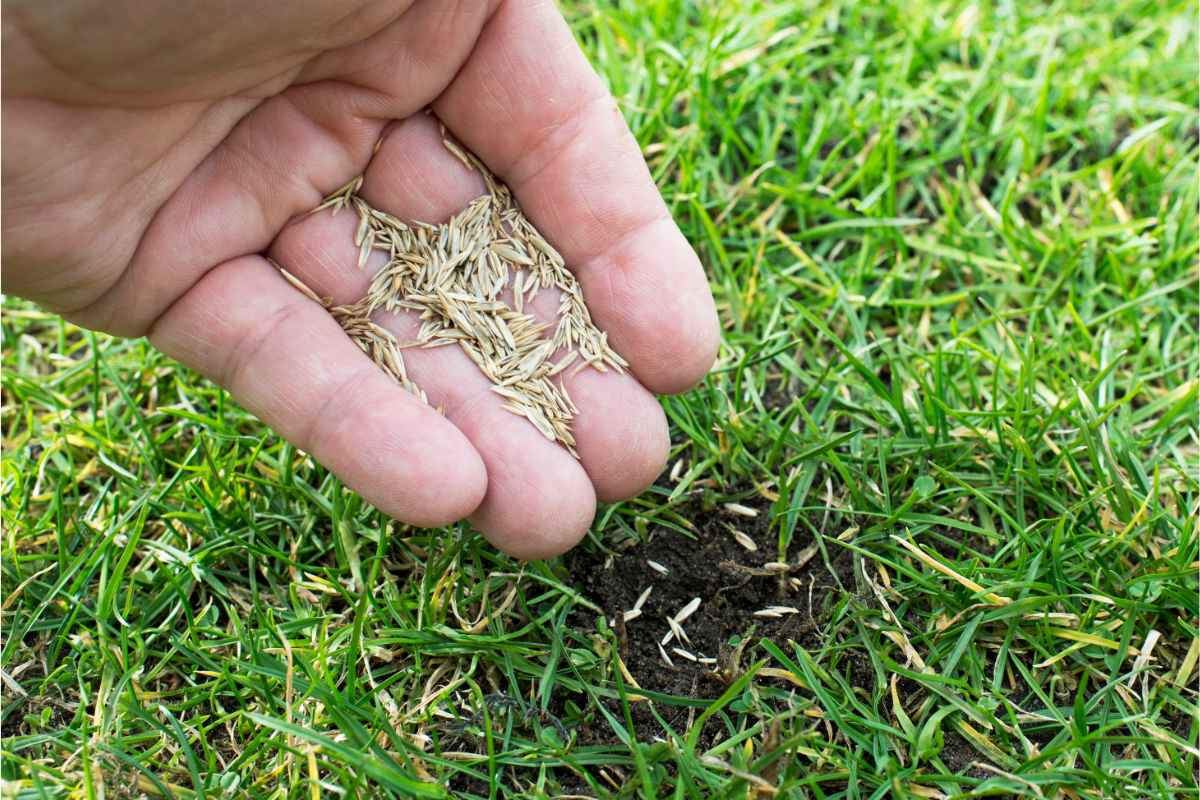
Choosing the right grass seed is the foundation for a healthy lawn. Your choice depends on several factors, including your climate, soil type, and preferences for appearance and maintenance.
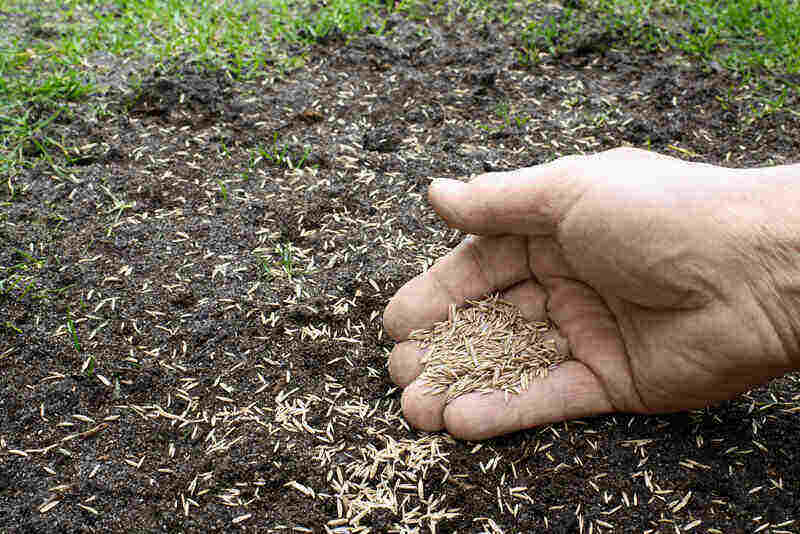
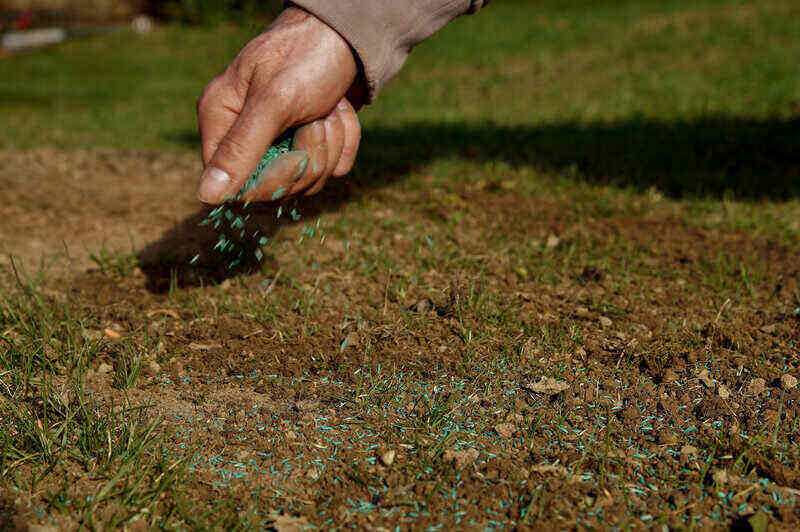
Photo Credit: iStockPhoto
Consider your climate
Determine your USDA hardiness zone to understand the climate in your area. Select grass species and varieties that are well-suited to your region. For instance, cool-season grasses like Kentucky bluegrass and fescue thrive in cooler regions, while warm-season varieties like Bermuda and Zoysia excel in hotter climates.
- Cool-season grasses: Kentucky bluegrass, fine fescue, tall fescue, bentgrass, perennial ryegrass
- Warm-season grasses: Bermudagrass, Zoysiagrass, centipedegrass, bahiagrass, buffalograss
- Transition Zone: Fine fescue, Kentucky bluegrass, tall fescue, buffalograss, Zoysiagrass, bermudagrass
Pro tip: The Transition Zone covers most of the Midwest and Mid-Atlantic regions of the U.S. and lies between the cool- and warm-season grass regions. To address the ever-changing climate, most homeowners opt for grass seed blends, combining both cool-season and warm-season varieties.
Assess your soil
Before you start planting grass seeds, it is essential to understand the composition and health of your soil. A soil test is the first step to a tailored approach that suits your soil. Start by obtaining a soil testing kit from your local garden center or reach out to your agricultural extension office for professional testing services.
Collect soil samples from various locations within your yard. These samples should represent the entire area you want to seed. Your soil test results will include your soil’s pH and nutrient levels.
- pH level: Soil pH measures the acidity or alkalinity of your soil. Most grass varieties thrive in soils with a pH level between 6.0 and 7.0. If your soil’s pH differs significantly, consider amending it by adding lime to raise pH (for acidic soil) or sulfur to lower pH (for alkaline soil).
- Nutrient levels: Your soil test also will reveal the essential nutrient levels of your soil, including nitrogen (N), phosphorus (P), and potassium (K). These nutrients are vital for healthy grass growth. Based on the nutrient deficiencies identified in the test results, apply appropriate fertilizers or soil amendments.
Understand sun and shade patterns
The amount of sunlight your lawn receives is another important factor in choosing the right grass seed. Observe your yard throughout the day to determine which areas receive full sun, partial sun, or shade.
Full sun areas typically receive at least 6 to 8 hours of direct sunlight daily and are suitable for sun-loving grasses. Partial sun areas receive 4 to 6 hours of sunlight and can support a wider range of grass types. Shady areas receive less than 4 hours of direct sunlight and require shade-tolerant grass varieties.
Choose grass seed varieties that are specifically formulated for the sun or shade conditions of your landscape.
- Sun-loving grasses: Most varieties thrive in full sun, including Bermudagrass, Kentucky bluegrass, and Zoysiagrass
- Shade-tolerant grasses: Fine fescue varieties, such as creeping red fescue and chewings fescue, as well as certain types of shade-tolerant ryegrass
Pro tip: In areas with varying sunlight, consider a blend that combines both sun-loving and shade-tolerant grasses to ensure a consistent look throughout your lawn.
Determine your lawn’s use
Some grass cultivars stand up better to heavy foot traffic, and all grass varieties have varying characteristics, including durability, appearance, and maintenance requirements. Here’s how to assess your lawn’s intended use:
- Recreation: If you have children or pets, prioritize grass seed varieties known for durability and resilience. Choose grasses that can handle varying growing conditions and foot traffic without thinning out or becoming damaged, such as certain types of Kentucky bluegrass, tall fescue, or Bermudagrass.
- Ornamental: If your primary goal is to create a visually pleasing lawn for ornamental purposes, you can focus on grass seed varieties that offer lush, fine-textured growth. Kentucky bluegrass, fine fescue, and zoysiagrass are examples of grasses known for their aesthetic appeal.
- Low maintenance: For a low-maintenance lawn, opt for grass seed blends or varieties that require less frequent mowing, watering, and fertilization. Fine fescue, some types of buffalograss, and certain native grasses can be suitable for low-maintenance lawns.
- Drought resistance: In regions with water restrictions or frequent drought conditions, prioritize drought-resistant grasses such as Bermudagrass, buffalograss, or certain fescue varieties.
Consider maintenance needs
Maintaining a healthy lawn requires ongoing care and attention, and understanding the specific maintenance needs of your grass seed is essential for long-term success. Different grass types have different maintenance needs. Here’s a breakdown of common grass types and their maintenance requirements:
High-maintenance grass types:
- Kentucky bluegrass: Known for its lush appearance, Kentucky bluegrass requires frequent mowing, consistent watering, and regular fertilization.
- Tall fescue: While it offers excellent durability, tall fescue can require more frequent mowing and maintenance, especially in hot climates.
- Bentgrass: Bentgrass provides a fine-textured lawn but demands precise mowing, frequent watering, and optimal fertilization.
Moderate-maintenance grass types:
- Perennial ryegrass: Perennial ryegrass falls in the middle for maintenance needs. It provides a lush, green lawn without the outrageous demands of some other cultivars.
- Zoysiagrass: Zoysia offers a good balance of durability and lower maintenance requirements, making it suitable for many lawns.
Low-maintenance grass types:
- Bermudagrass: Landscapers love Bermudagrass for its heat and drought tolerance.
- Buffalograss: Buffalograss requires less frequent mowing and watering. It’s a great choice for those seeking an eco-friendly, low-input lawn.
- Fine fescue: Fine fescue varieties, such as creeping red fescue and chewings fescue, are shade tolerant and typically require minimal maintenance.
- Centipedegrass: Centipedegrass requires less watering and fertilization.
Prepare your lawn
Prepare your lawn before planting grass seed to ensure optimal grass sprout and long-term success. Proper preparation sets the stage for a healthy establishment and only requires a few simple steps and tools.
Tools needed:
- Garden rake or leveling rake
- Soil testing kit
- Soil amendments
- Grass seed
- Core aerator (optional)
- Dethatching rake or dethatching machine (optional)
- Shovel (optional)
- Soil tiller (optional)
Steps to prepare your lawn for seeding:
- Clear the area: Remove debris, rocks, weeds, and vegetation from the area where you plan to plant grass seed.
- Conduct a soil test: Perform a soil test to determine your soil’s pH level, nutrient content, and texture.
- Amend the soil: Based on your soil test results, amend your soil as needed. Add lime or sulfur to adjust pH, incorporate organic matter to improve texture, and apply necessary nutrients.
- Aeration (optional): For dense or compacted soil, consider aerating your lawn to allow air, water, and nutrients to penetrate the root zone more effectively. A core aerator removes small plugs of soil to improve compaction. Some form of breaking up the soil, whether with core aeration or a rototiller, is necessary before you can plant grass seed on hard dirt.
- Level the surface: Ensure a smooth and even lawn by leveling the soil surface with a garden rake or leveling tool. This prevents low spots where water can collect.
- Address drainage issues: If your lawn area has poor drainage, consider installing drainage solutions like French drains or regrading the slope to prevent waterlogging.
- Seedbed preparation: Prepare a fine seedbed by gently tilling the top 2 to 4 inches of topsoil. Remove rocks, roots, and large clumps to create a loose, crumbly surface.
- Seed selection: Choose the grass seed variety or blend based on your climate, sunlight, and intended use.
- Dethatching (optional): For overseeding, detach your lawn to remove the layer of dead grass and roots and promote better seed-to-soil contact.
Use proper seeding techniques
Proper seeding ensures your grass seed has the best chance to germinate, take root, and thrive. Follow these essential seeding techniques:
Tools needed:
- Seed broadcast spreader or drop spreader
- Garden rake
- Starter fertilizer
Steps to seed your lawn:
- Seed distribution: Use a seed spreader for even distribution of your grass seed. Adjust the spreader settings according to the recommended seeding rates on your seed package.
- Overlapping passes: To avoid gaps or uneven coverage, overlap your passes slightly when spreading your grass seed.
- Bi-directional seeding: For optimal coverage, sow half of the grass seed in one direction (e.g., north to south) and the remaining half perpendicular to the first direction (e.g., east to west).
- Light raking: After spreading the seed, lightly rake the soil’s surface with a garden rake to ensure good seed-to-soil contact. This helps the seeds settle into the soil.
- Starter fertilizer: Apply a starter fertilizer evenly over the seeded area. The fertilizer provides essential nutrients for seedling growth.
Pro tip: Broadcast spreaders disperse grass seeds in a wide pattern and are suitable for large areas. On the other hand, drop spreaders release seeds directly downward in a controlled path, making them ideal for narrow and small areas.
Water and care for your newly seeded lawn
After planting your grass seed, ongoing care is essential to promote growth and maintain a healthy and vibrant lawn.
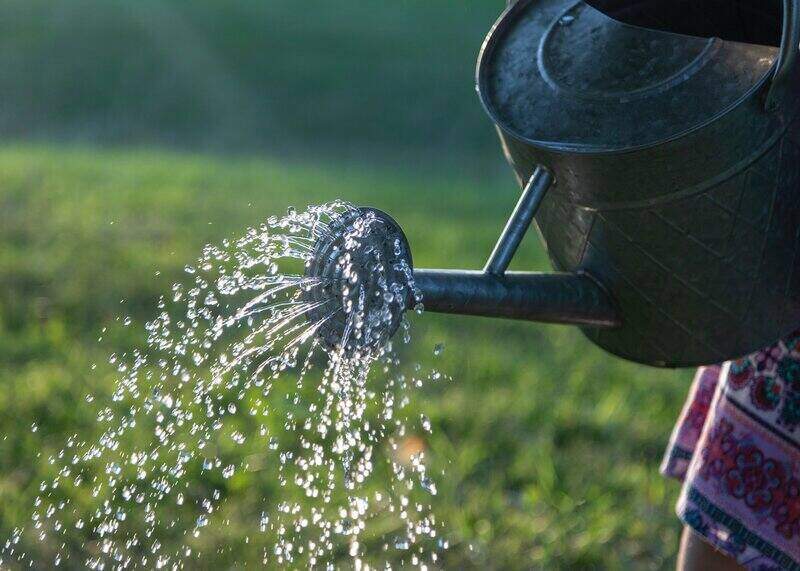
Watering
The frequency of watering your lawn depends on several factors, including your climate, grass type, soil type, and recent weather conditions. Here are some general guidelines for watering your new grass seed:
- Weeks 1 and 2: During the germination process, it is essential to keep the soil moist. Start with short watering sessions, typically 10 to 15 minutes, two to three times per day to prevent surface drying.
- Weeks 3 and 4: As your grass seedlings grow, extend your watering duration. Aim for 20 to 30 minutes per session, two times per day, to ensure the water penetrates deeper into the soil. This promotes deeper root development.
- Weeks 5 through 8: By now, your grass is more established. Continue watering for 20 to 30 minutes per session, but adjust based on weather. Aim to water every other day.
- Weeks 9+: As your lawn matures, transition to a typical watering schedule. Most grass cultivars need 1 inch of water per week. Aim for three 20-minute watering sessions weekly, depending on the weather.
Caring for your newly seeded lawn
Planting and caring for your new grass seed can be rewarding. Follow a few tips and tricks to ensure success the first time:
- Fertilization: Apply a starter fertilizer with a balanced N-P-K ratio to provide essential nutrients for seedling growth. Avoid excessive nitrogen in the early stages. It encourages fast growth but weak roots.
- Mowing: Don’t mow your lawn until it reaches 3 to 4 inches tall.
- Weed control: Remove weeds by hand as soon as possible to prevent competition with your grass seedlings. Avoid using pre-emergent herbicides. They slow seed germination.
- Avoid foot traffic: Never walk on your newly seeded lawn.
- Lay mulch or peat moss: Apply a thin layer of mulch, straw, or peat moss over newly seeded areas. This helps retain moisture, prevent erosion, and protect your seeds from birds and other pests.
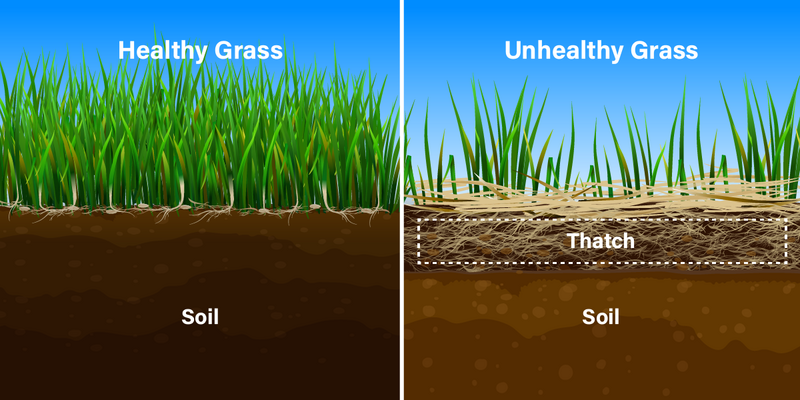
- Dethatching and aeration: Dethatch and aerate your lawn before overseeding bare spots. This reduces competition and enhances seed-to-soil contact.
- Use a sprinkler system: Manual and automatic lawn sprinklers ensure your new lawn receives the right amount of water, covering large areas in a shorter time. Furthermore, most irrigation systems have rain or moisture sensors that automatically interrupt irrigation when sufficient rainfall occurs, lowering your chances of over- and under-watering.
Importance of proper grass seed planting
Proper grass seed planting is the cornerstone of a thriving lawn. It ensures uniform coverage, encourages strong root development, and suppresses weeds while reducing thatch buildup.
Adequate seed-to-soil contact and appropriate soil preparation create an environment where your grass can establish itself healthily and resist diseases and pests. This not only enhances the aesthetic appeal of your outdoor space but also contributes to a more water-efficient and environmentally friendly landscape.
When is the best time to plant grass seed?
The best time to plant grass seed depends on your climate and the type of grass you are planting. In general, there are two primary planting seasons:
Fall planting (August to early October):
For cool-season grasses like Kentucky bluegrass, fescue, and perennial ryegrass, the ideal time for planting is late summer to early fall. This allows your grass seed to germinate and establish itself before winter’s cold temperatures arrive.
Fall planting takes advantage of cooler weather and more consistent moisture levels, reducing the stress on young seedlings. The warm soil and mild temperatures are also conducive to root growth.
Spring planting (March to May):
Warm-season grasses like Bermudagrass and Zoysiagrass should be planted in the spring when soil temperatures consistently reach 60 degrees Fahrenheit or higher. This is usually in early to late spring, depending on your location.
Spring planting allows these grasses to establish before the hot summer months, which is crucial for their survival in warm climates.
FAQ about how to plant grass seed
How long does grass seed take to grow?
Seed germination takes between five to 30 days, depending on the type of grass, weather conditions, and soil quality. Germination rates for popular grass cultivars include:
| Grass Type | Germination Rate |
| Bahiagrass | 7 to 21 days |
| Bermudagrass | 10 – 30 days |
| Centipedegrass | 14 – 21 days |
| Fine Fescue | 7 – 14 days |
| Kentucky Bluegrass | 14 – 30 days |
| Perennial Ryegrass | 5 – 10 days |
| Tall Fescue | 10 – 14 days |
| Zoysiagrass | 14 – 21 days |
How do I keep birds from eating my grass seed?
Cover the seeded area with straw, moss, or seed blankets to deter birds.
What is the best seed mix for the Transition Zone?
Grass seed mixes often consist of a combination of grass species to ensure a year-round green and healthy lawn. Common grass seed mixes for the Transition Zone include:
- Kentucky bluegrass and perennial ryegrass
- Zoysiagrass and buffalograss
- Tall and fine fescues
- Tall fescue and bermudagrass
- Fescue and Zoysiagrass
Professional lawn care
Your lawn journey begins with planting grass seeds and ends with proper soil preparation, watering, and care to nurture your lawn into a thriving and resilient landscape. If the steps seem daunting or you do not have the free time, let Lawn Love connect you with a local lawn care professional to take care of the seeding and maintenance.
Main Image Credit: schulzie | Canva Pro | License